Sign in
If you do not have an account, click Create AccountCreate Account
Some items are no longer available. Your cart has been updated.


This discount code cannot be used in conjunction with other promotional or discounted offer.
Your cart is empty.

Sale price GBP £11.18 Regular price GBP £15.92
OR

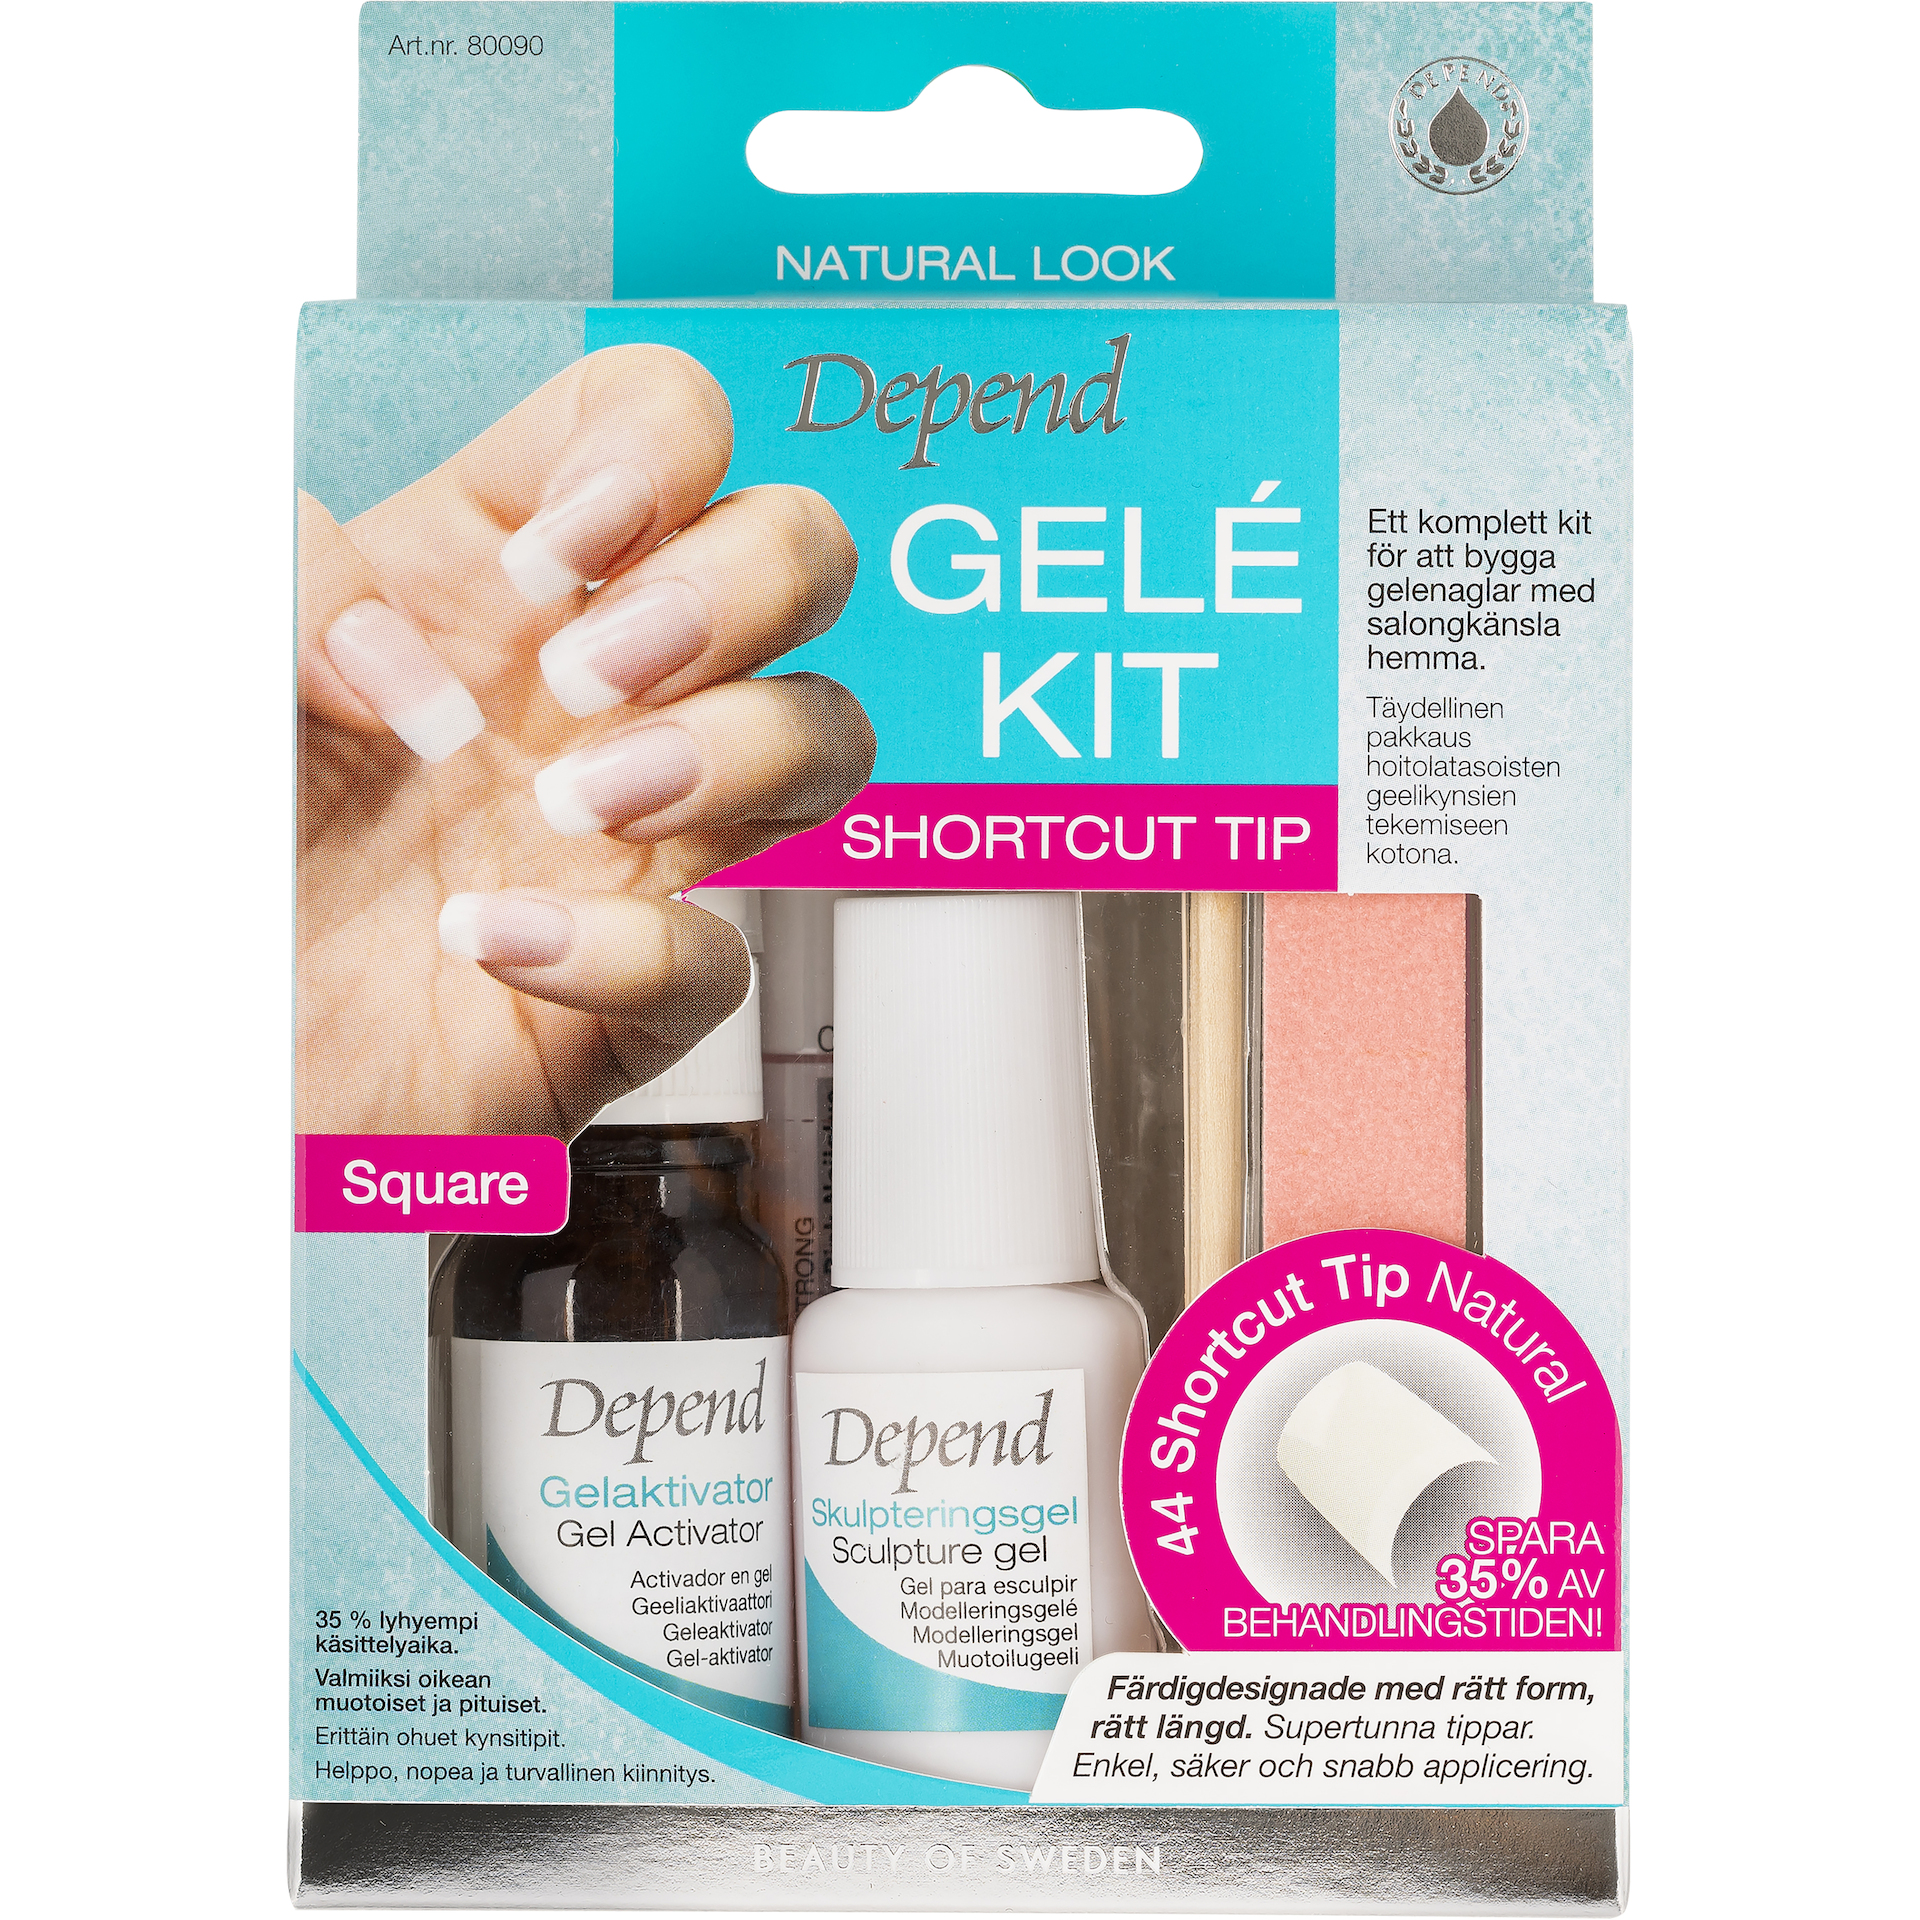
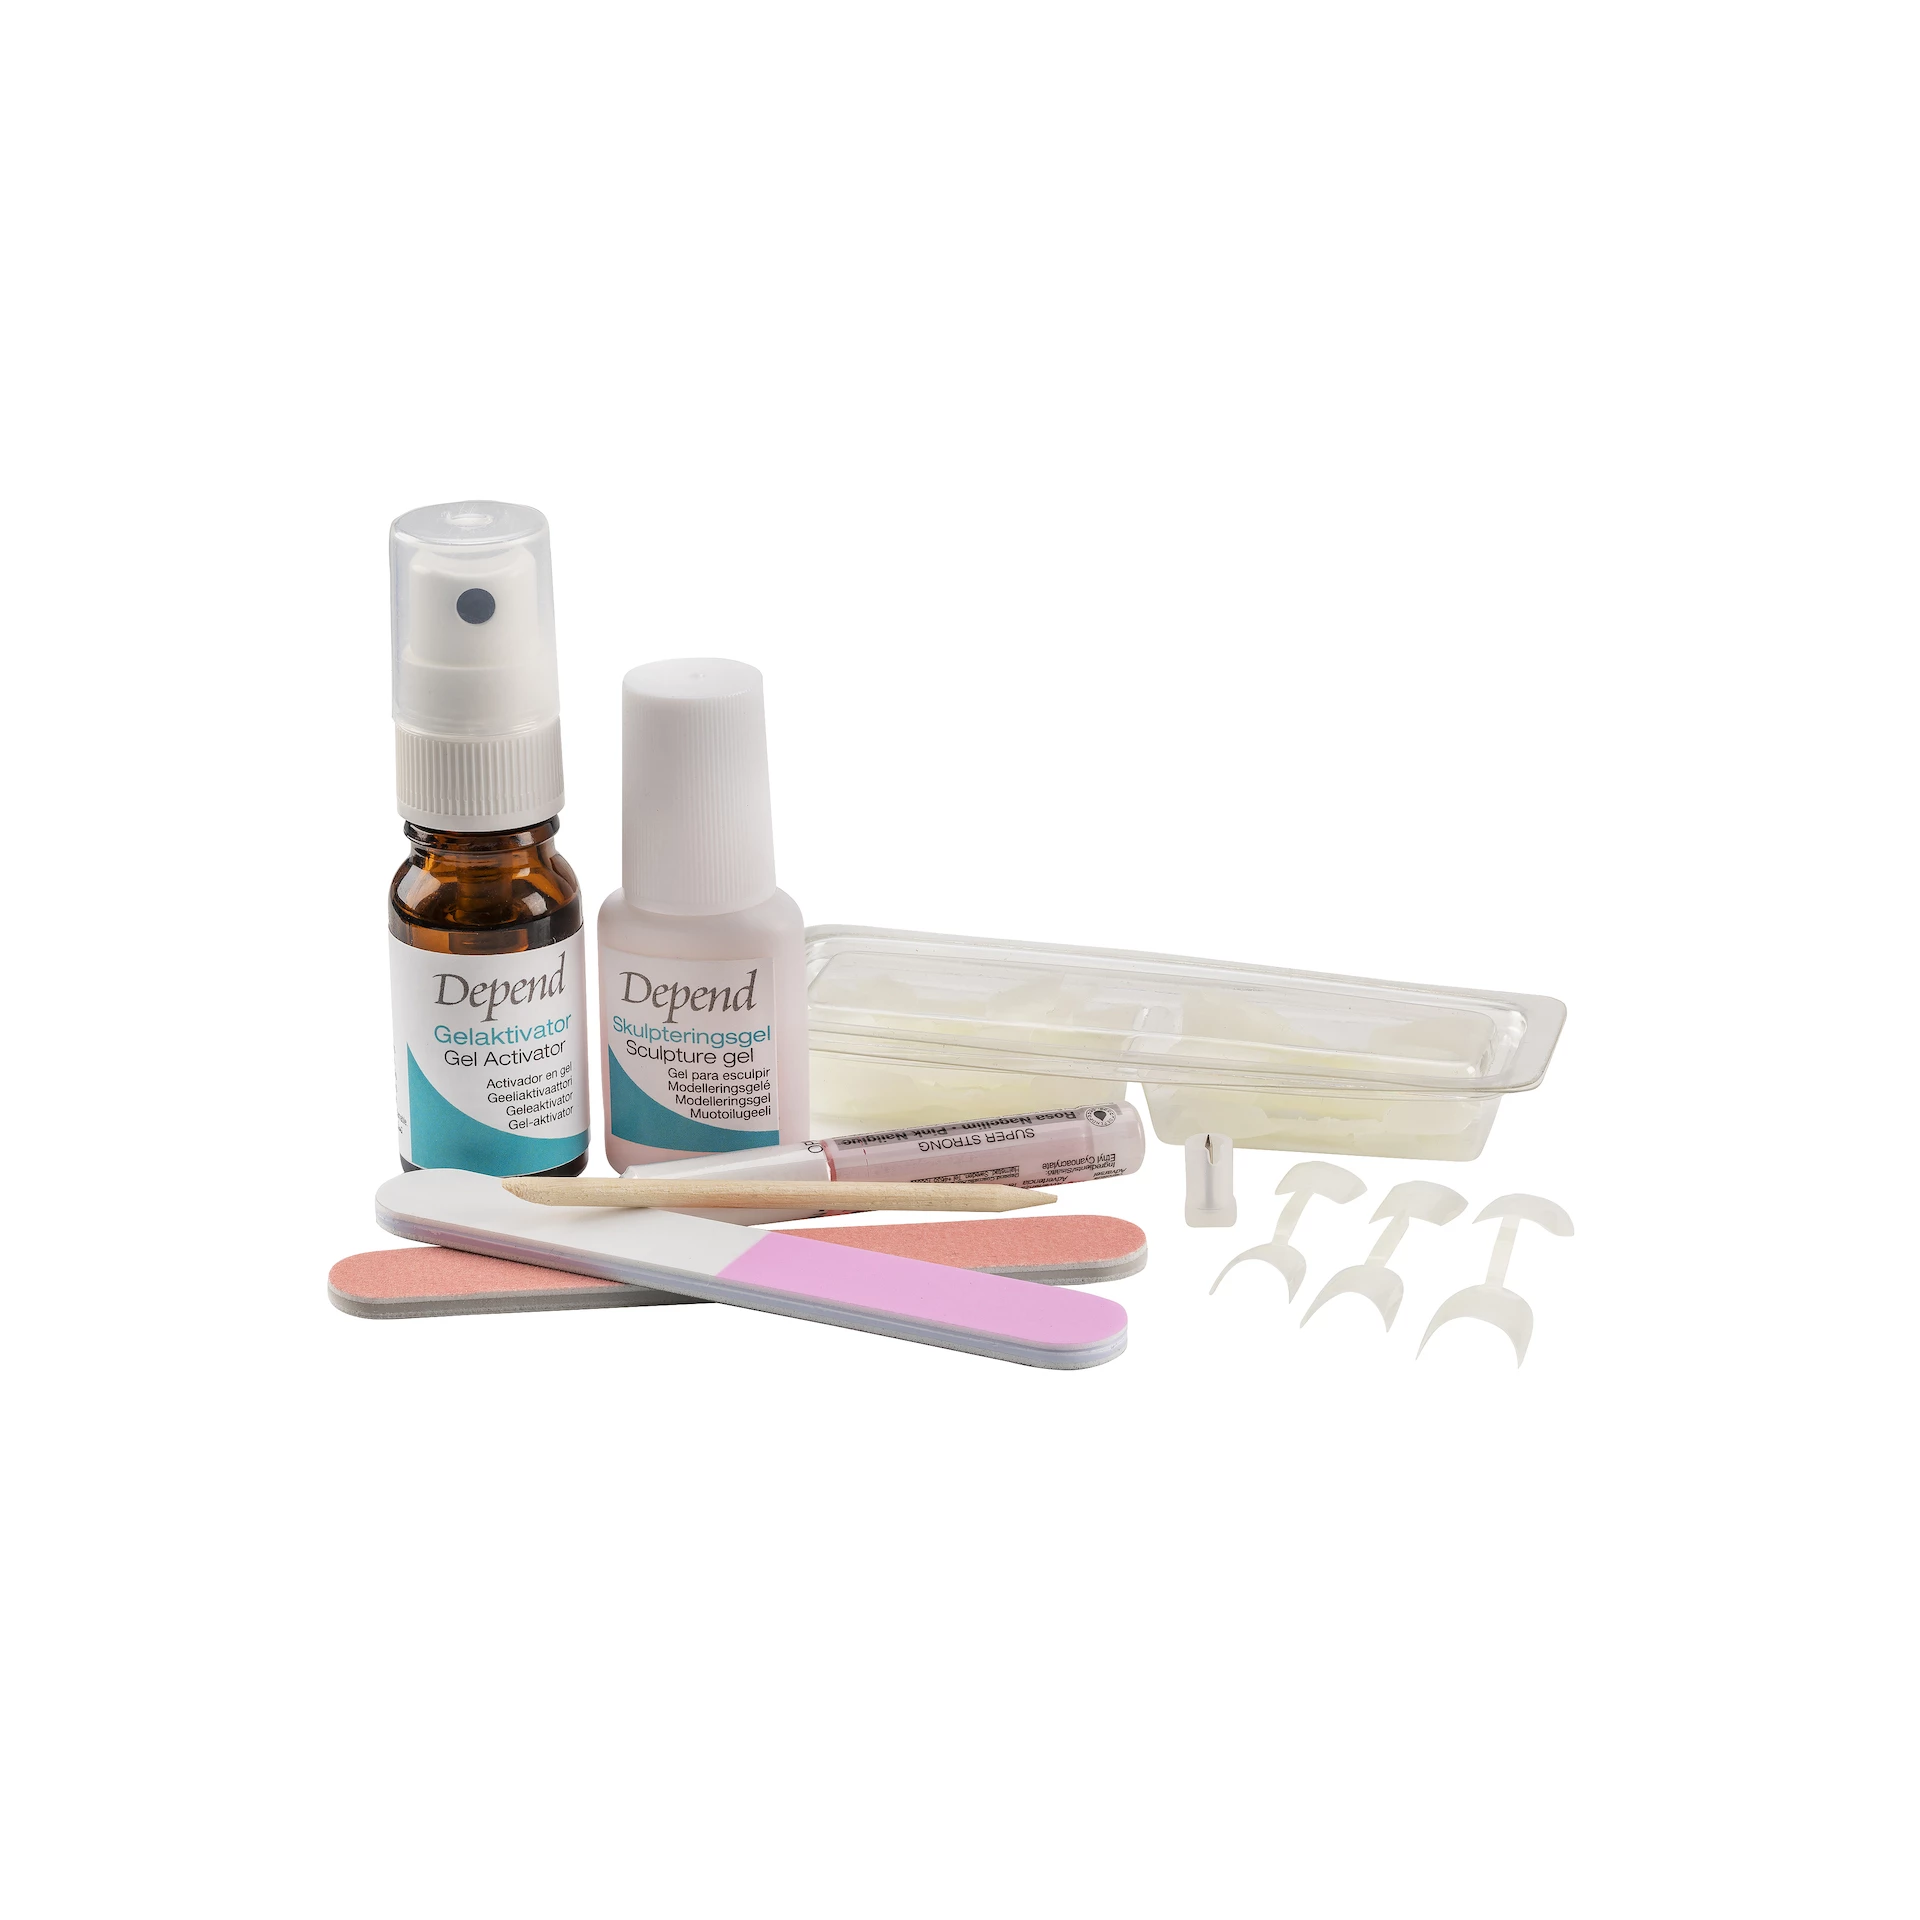
Sculpting gel: Ethyl Cyanoacrylate, Polymethyl Methacrylate, BHA, Silica Silylate, CI 16035. Gel activator: Ethyl Acetate, Dimethyltolylamine.
Here's how: 1. Do a thorough manicure - file and shape your nails. Gently push back your cuticles. Also use a polishing file to smooth the nail surface. Tip: use Depend cuticle peeling to remove dead skin cells along the cuticles and on your nail, so you get a better hold on your sculpted nails. 2. Gently "roughen" the surface of the nail with surface 1 (pink) on the polishing file. 3. Look over the tips to get a feel for which tip fits your nail. The tip should cover the nail from edge to edge in width. If you can't find a tip that fits exactly, you can always file down the edges of a larger tip until it fits perfectly. 4. To get the best adhesion surface, we recommend that you clean with an acetone- and oil-free nail polish remover, we recommend Depend blue nail polish remover. After this step, do not touch the nail plate with your fingers, this is to avoid smearing the nail and tip with grease and bacteria, which can lead to premature release of your sculpted nails. 5. Then apply glue to the thin adhesion surface on the back of the tip. The glue should cover from edge to edge. Press the tip against the nail so that the small edge on the back of the tip meets your natural nail edge. Be sure not to leave air bubbles between the tip and the natural nail. Hold until the glue has dried. If necessary, press the edges of the tip down against the nail using the manicure stick. Natural Look Shortcut Tip: Do not break off the tip until it has been applied. 6. Also file very carefully on the edge that remains between the tip and your natural nail to get a smoother transition. File only the tip, not your natural nail. 7. Time to apply sculpting gel and gel activator (protect the surface during the treatment). NOTE! Start with the 4 fingers and lastly the thumb on each hand. Apply a thin layer of sculpting gel along the entire length of your natural nail and onto the tip. The gel must not touch the cuticle as this increases the risk of peeling, but place it approximately 1 millimeter away from the cuticle. Then spray one nail at a time from a distance of approximately 20 cm, one (1) spray pressure per nail with the gel activator (NOTE! Never spray more than one spray pressure. If you do, the surface you are sculpting will crack. Therefore, make sure that the spray jet only reaches one nail at a time.) When it is completely dry, repeat the same steps two more times. A total of three thin applications of sculpting gel and gel activator. (NOTE! Remember to wipe the opening of the sculpting gel before you put the cap on, otherwise it risks sticking together). 8. Finish the treatment by polishing the nails with the polishing file. You have now created a nice, high-gloss look with lasting results. After about 1.5 weeks, file and smooth out the growth and then apply more sculpting gel and gel activator - this is to refresh the nails and make them last longer. When removing tips and gel, use Depend false nail remover. You can paint these sculpted nails in your favorite color. Remember to use base and top coat. When removing the nail polish, use Depend red nail polish remover to avoid damaging your sculpted nails. Prevent cracking by: ALWAYS apply thin layers of the sculpting gel. ALWAYS spray only one (1) spray per nail with the gel activator. Last but not least: Make sure the nail plate is clean and dry before application – this is the key to a successful treatment. Practice makes perfect! Good luck.
Sale price GBP £11.18 Regular price GBP £15.92
Comment